> For the complete documentation index, see [llms.txt](https://doc.thordata.com/doc/llms.txt). Markdown versions of documentation pages are available by appending `.md` to page URLs; this page is available as [Markdown](https://doc.thordata.com/doc/free-tools/sso/using-thordata-to-set-up-okta-sso.md).
# Using Thordata to set up Okta SSO
**Requirements:**
* An Okta organization account with administrator privileges.
* A Thordata account with administrator privileges.
**Steps:**
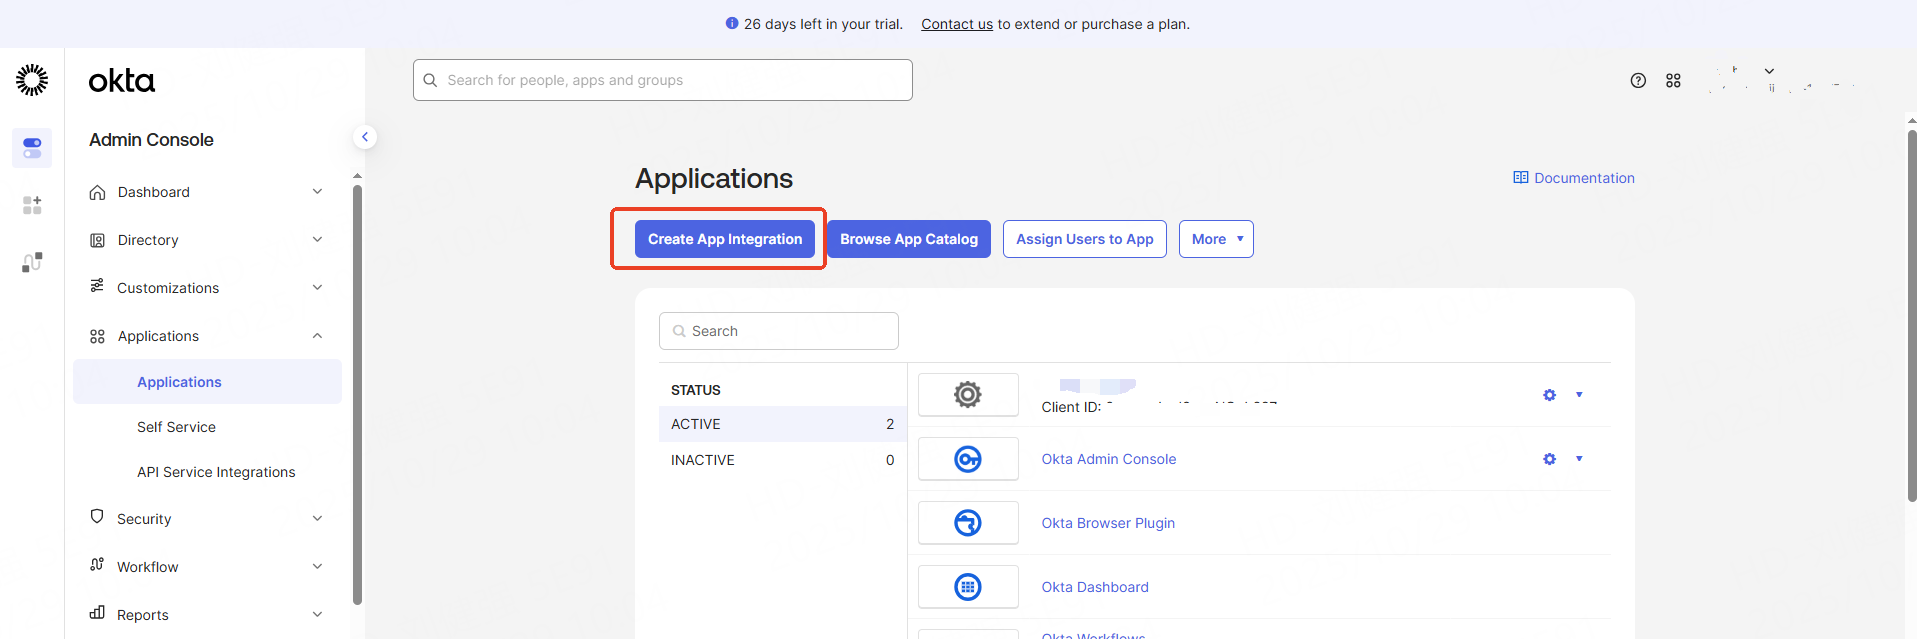
1. **Steps:**In your Okta Admin Dashboard, go to **Applications > Applications**.\
(`https://[your_domain]-admin.okta.com/admin/apps/active`)
2. Click **Create App Integration**.
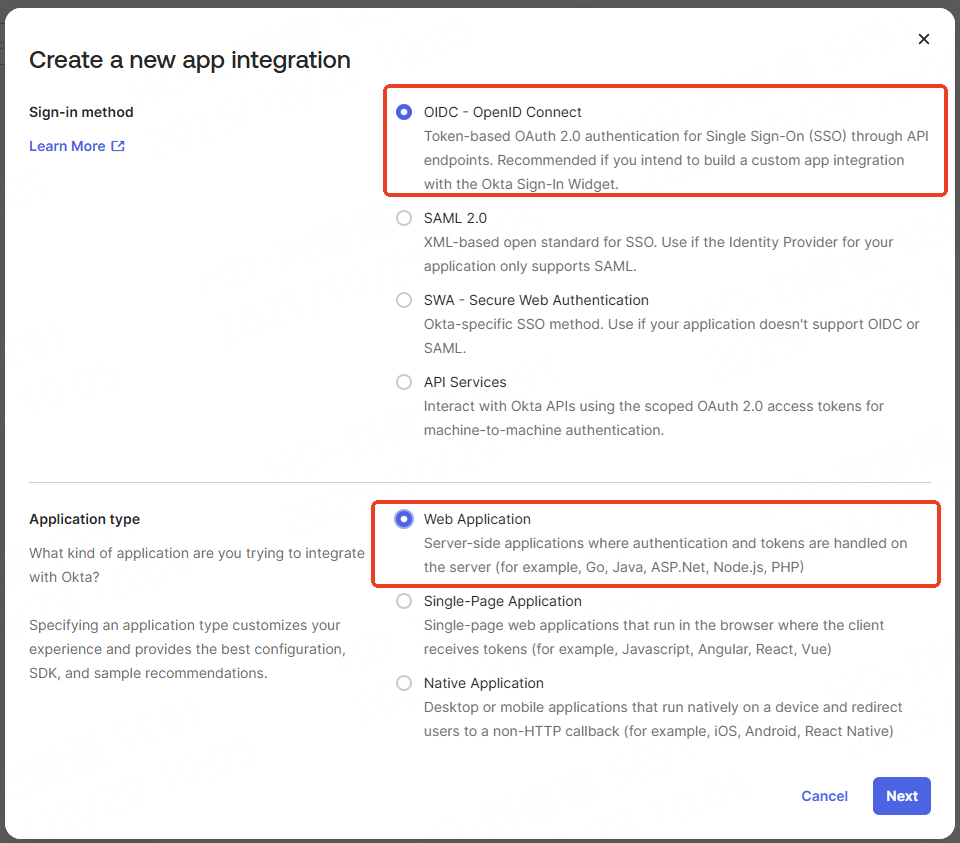
3. Select **OIDC - OpenID Connect** as the Sign-in method.
4. Choose **Web Application** as the Application type, then click **Next**.
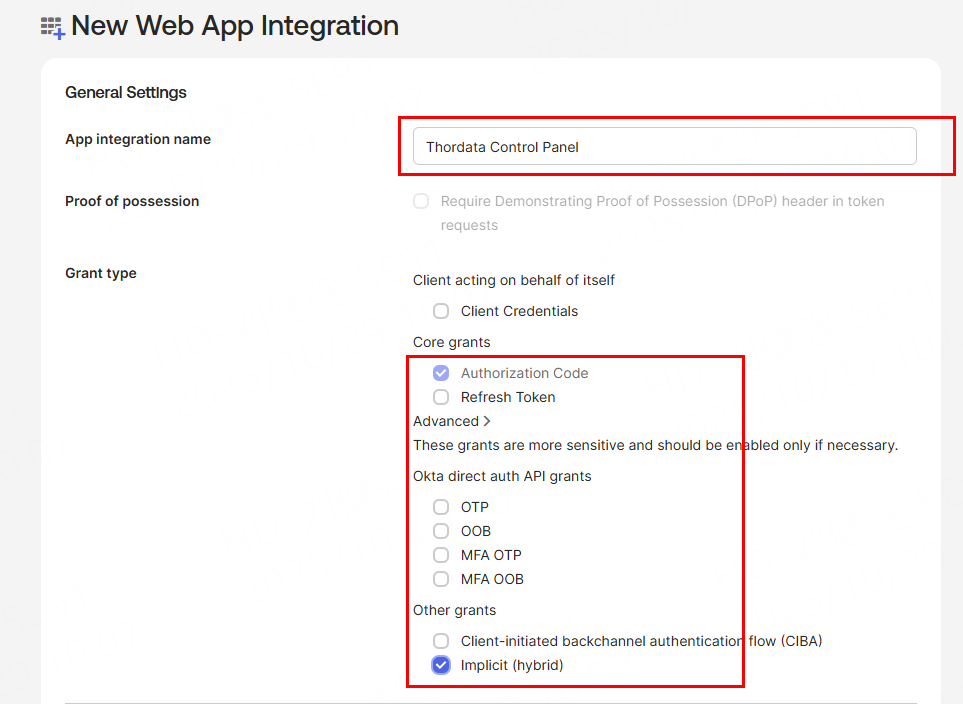
5. You will be redirected to a new Web App Integration page. Here, you can name your app integration (we recommend using "Thordata Control Panel").
6. Under **Grant type**, select **Implicit** and **Authorization Code** \[Optional].
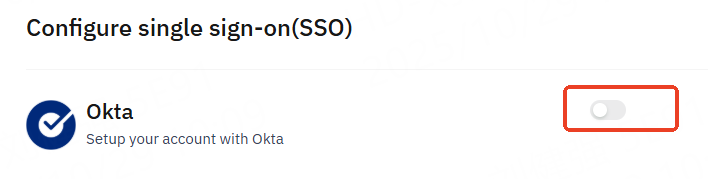
7. Go to the Thordata Control Panel.
8. Open the **OKTA Configuration** dialog.
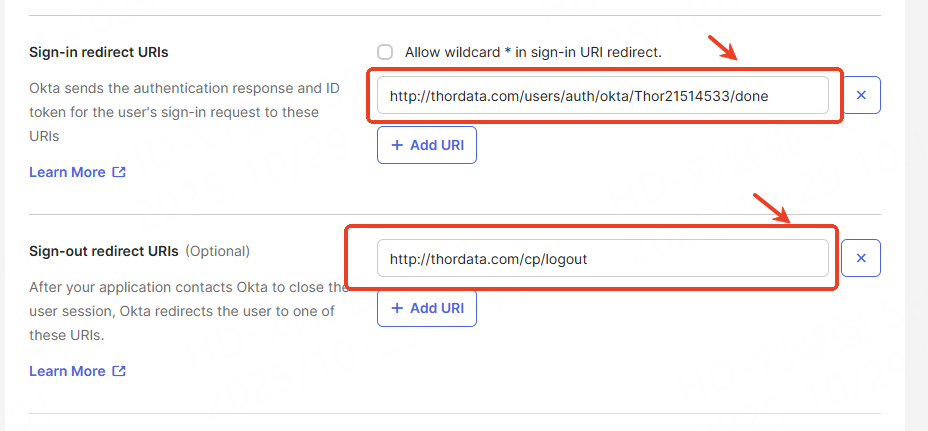
9. Copy the **Sign-in redirect URI**.
10. Paste it into the corresponding field in the new app settings in Okta.
11. Repeat the same process for the **Sign-out URI**.
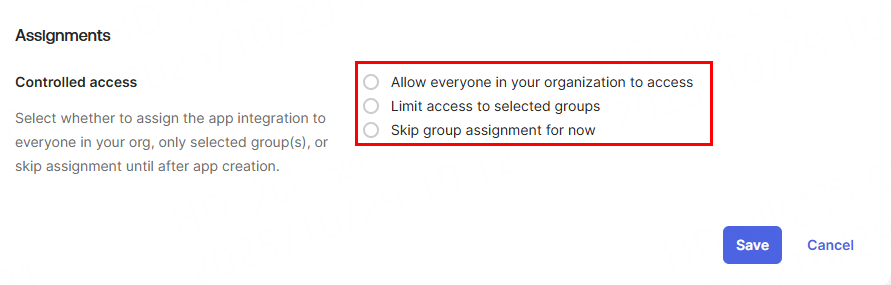
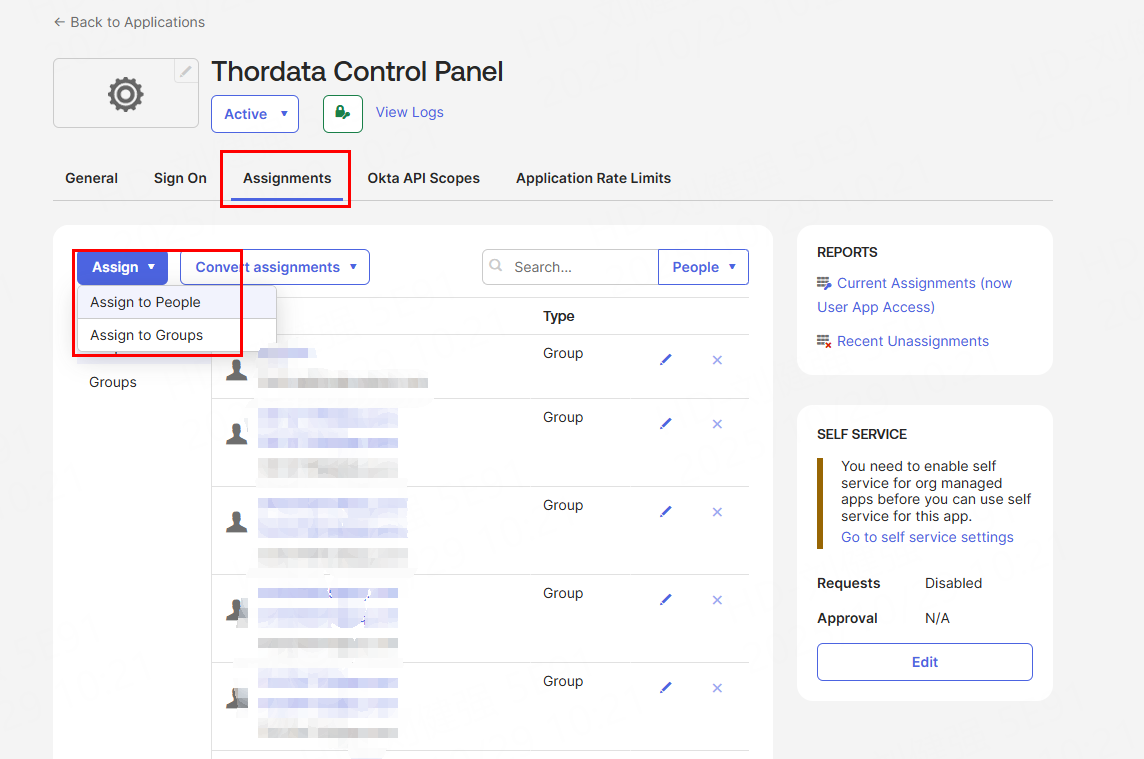
12. Under **Assignments**, select the desired access level.
13. Click **Save**.
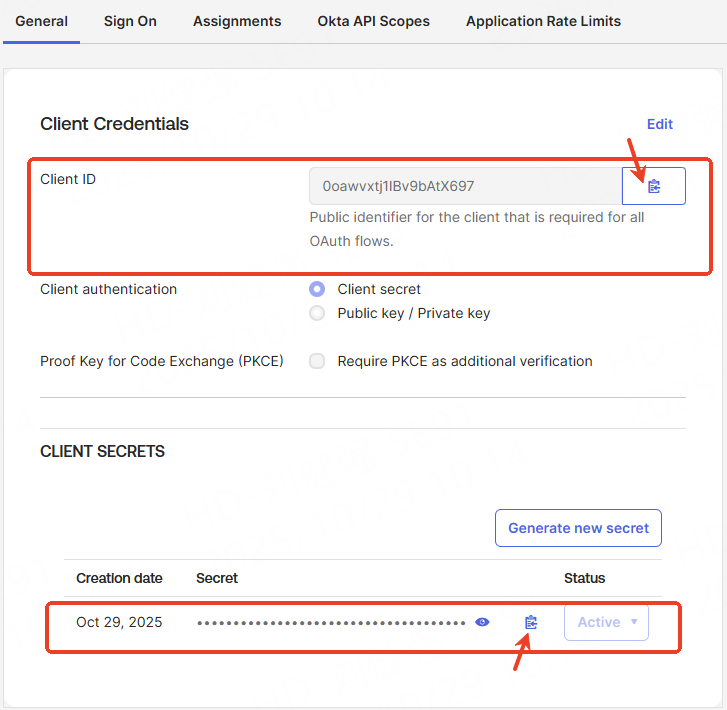
14. You should now be on the settings page for the new app integration.
Copy your **Client ID**, **Client Secret**, and **Okta Domain** to the OKTA settings dialog in the Thordata Control Panel.
**Okta Domain:**
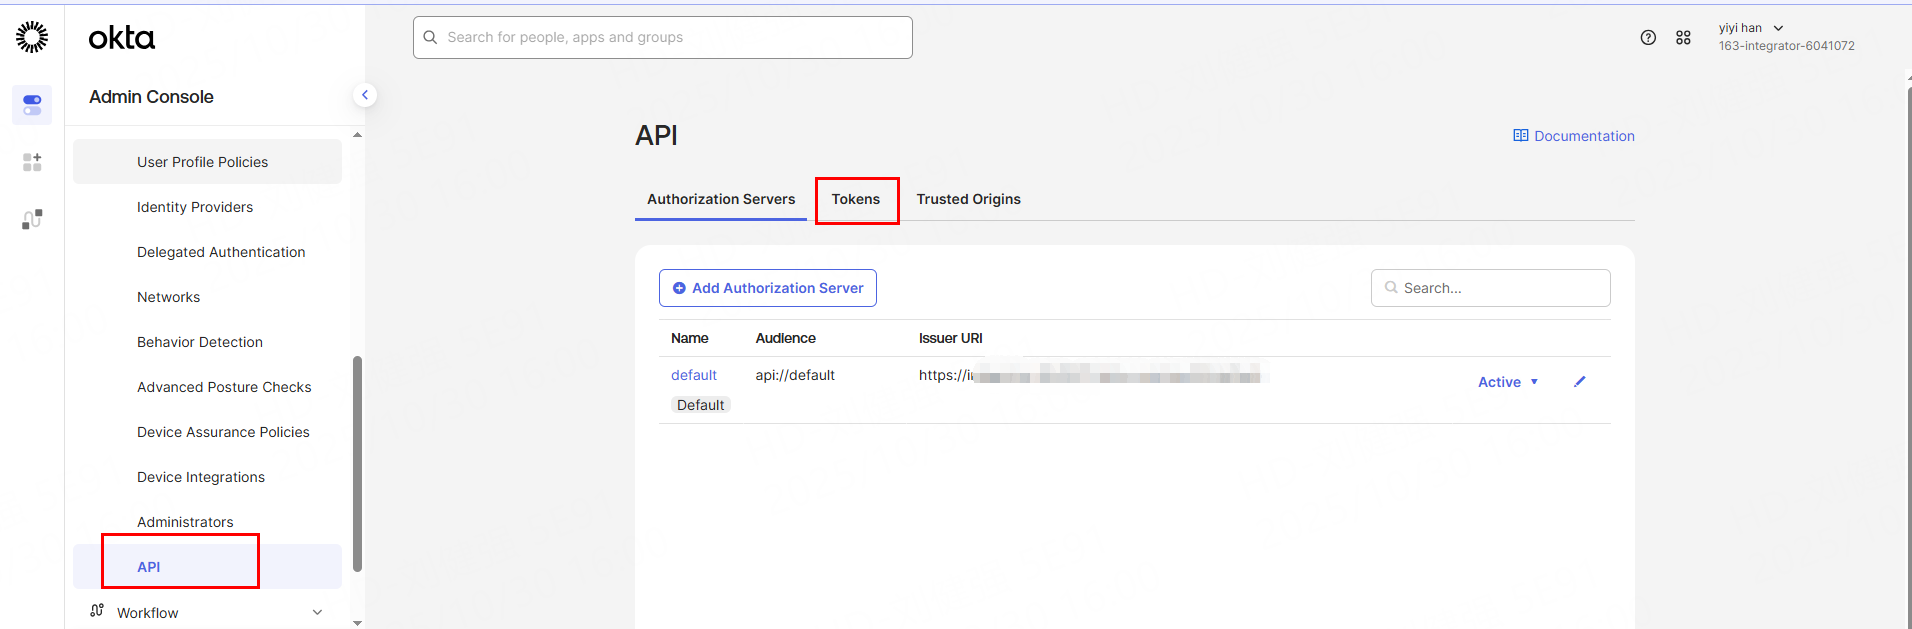
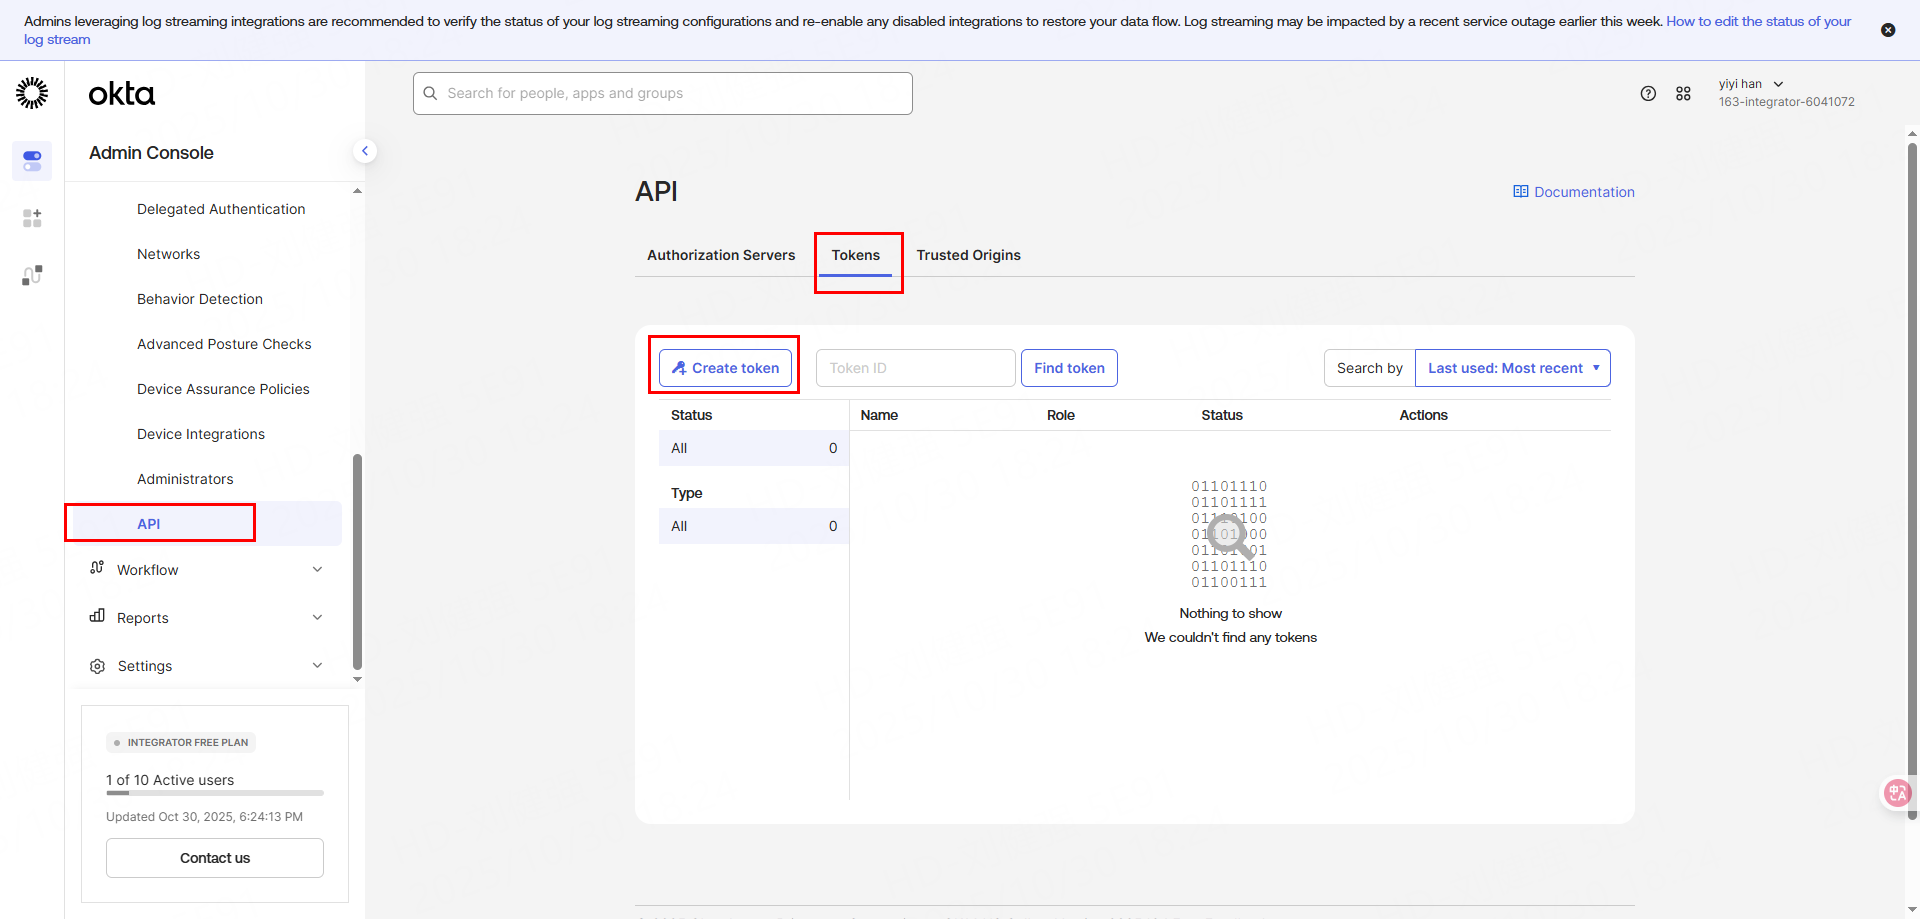
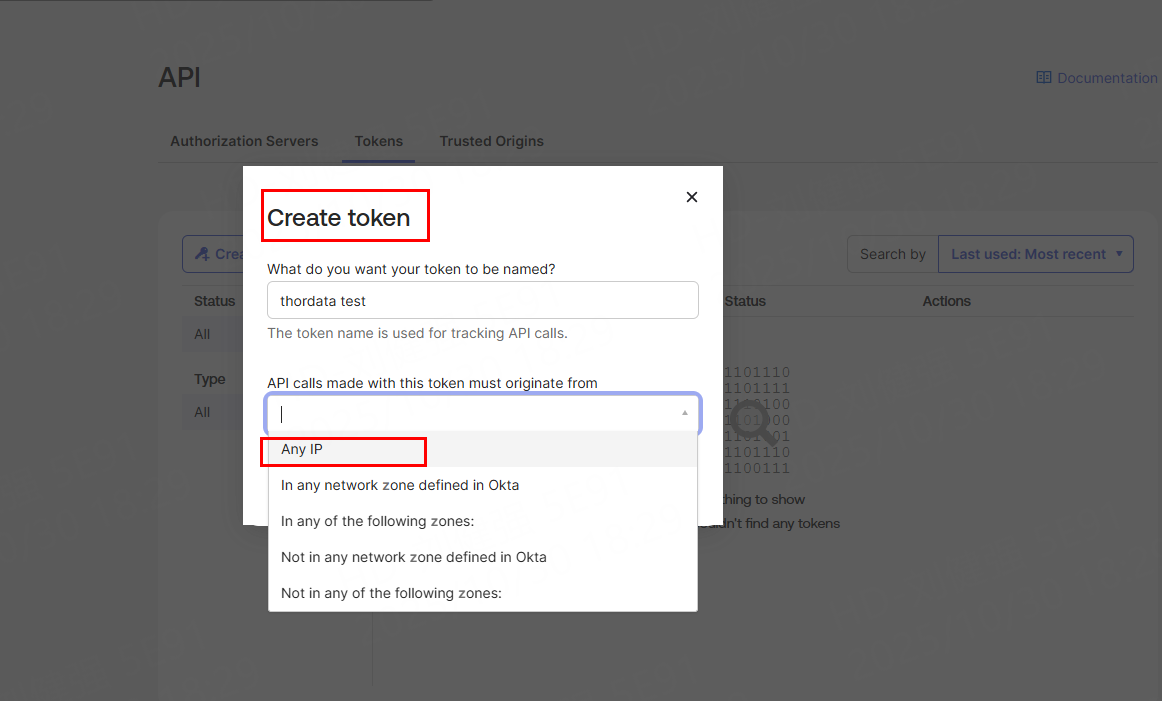
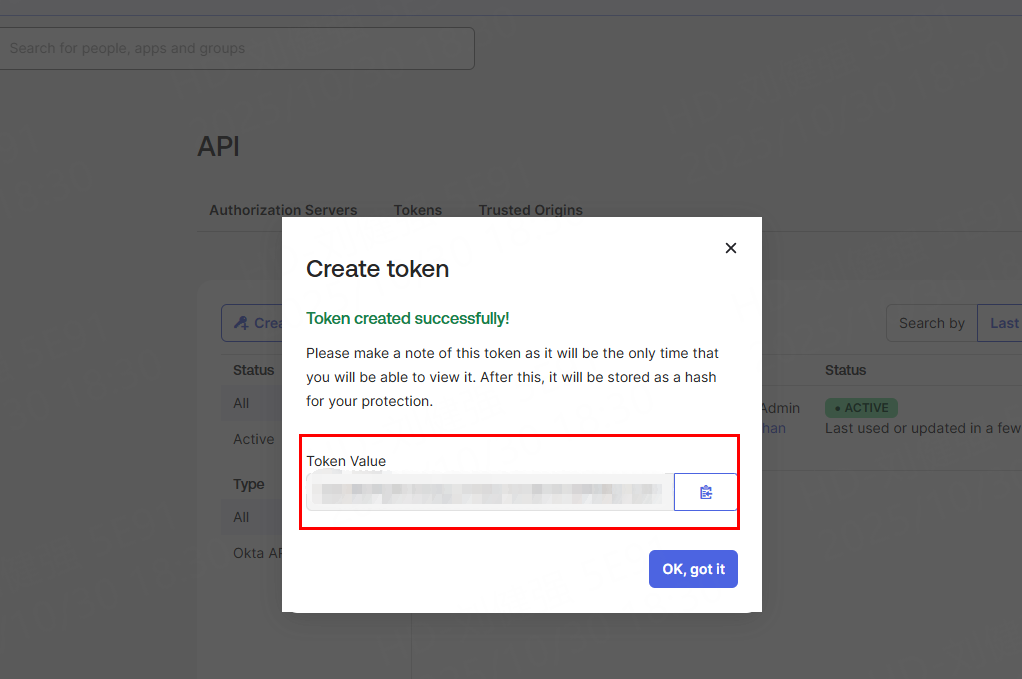
15. You should go to Security-API-Tokens to create your token
Then copy it into the OKTA settings dialog in the Thourdata control panel.
16. Click "Activate". If you select "Allow everyone access", skip step 17.
17. Click **Activate**. *(If you selected "Allow everyone access," skip step 16.)*
18. Go to the **Assignments** tab and assign the users permitted to use this integration.
17. Go to the Thordata settings page and ensure all required users are displayed. *Note: We are currently working on providing user support – you should manage this manually for now.*
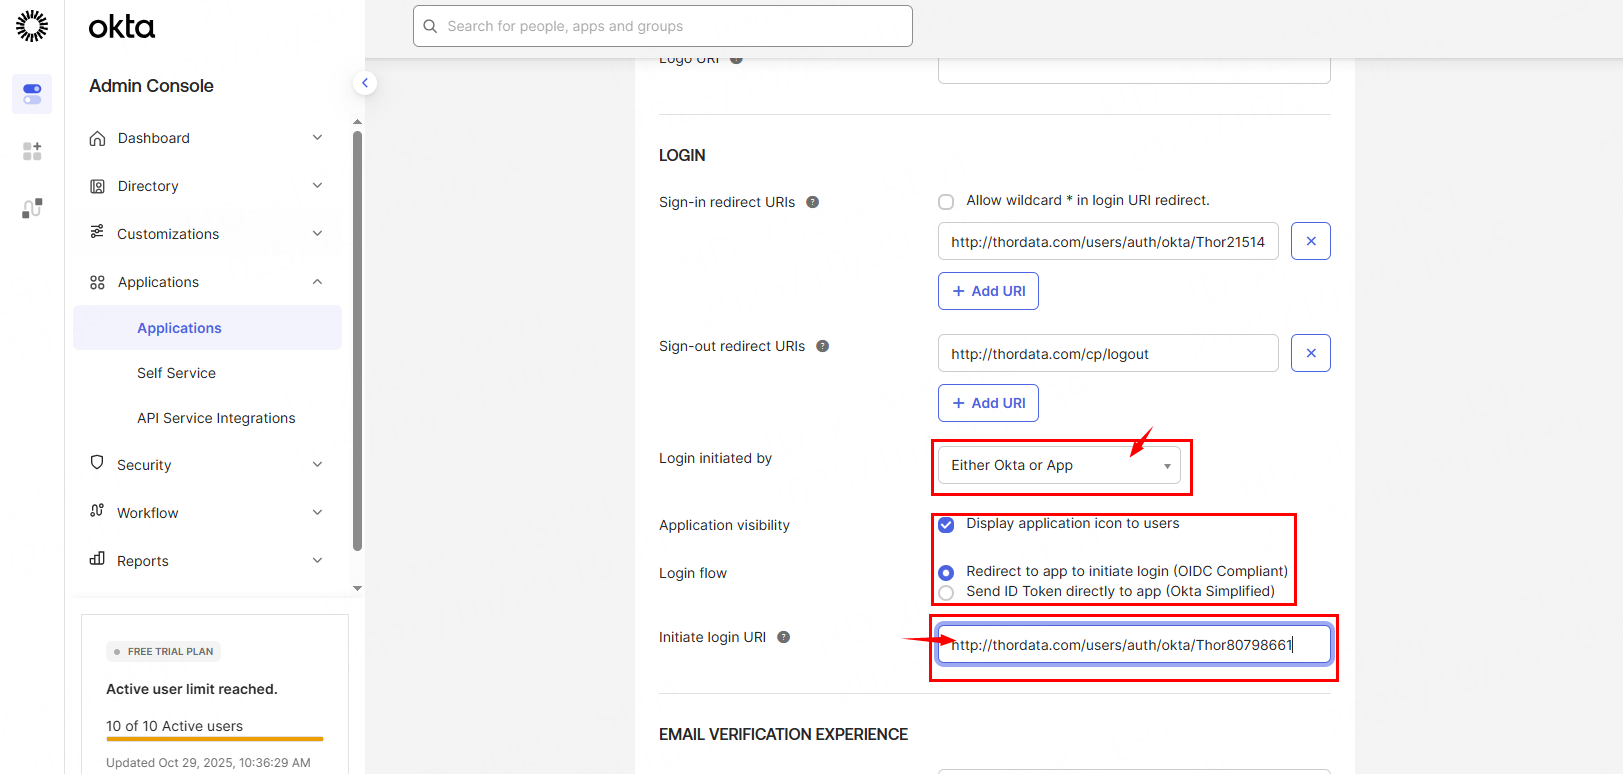
The following steps are optional. They enable your users to initiate authentication from their dashboard or the Okta Chrome extension.
18. Scroll down to **General Settings** and click **Edit**.
19. Configure the following settings:\
\* **Login initiated by:** Okta or App\
\* **App visibility:** Display application icon to users\
\* **Login flow:** Redirect to app to initiate login (OIDC compliant)
Copy the **Initiate login URI** from the Control Panel.
20. Save the changes. The integration is now ready.
**Important Notes:**
* The **Okta Domain** should be the one that appears in your app integration settings (e.g., `yourcompany.okta.com`), not the one you see as an administrator (e.g., `yourcompany-admin.okta.com`).
* Ensure the **credentials provided to Thordata are correct**, as we cannot verify them personally.
* The **Sign-in redirect URI is mandatory** for the SSO functionality to work.
* The **Initiate login URI is required** if you want to use the feature from the Okta Chrome extension or the Okta dashboard.